 |
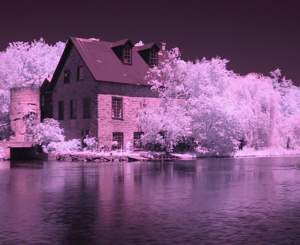
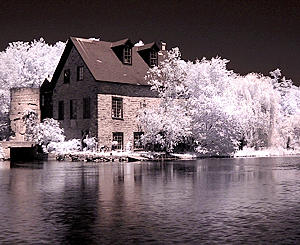
Original Photo (Bedford Mills)
Canon Powershot G1, Hoya R72 filter, ISO 100, f.2.0, 1/3 sec, exposure - 2/3 f-stop.
(of note is the fact that this photo was taken handheld from a boat)
This is what the photo looks like out of the camera (original photo is much larger). Note the high magenta cast that the R72 filter produces.
|
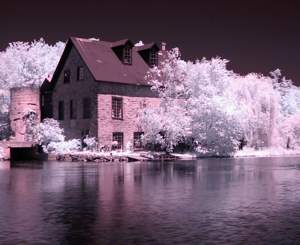 |
Auto-Equalized/LevelledThe first adjustment made to the photo is to auto level it. In Corel PhotoPaint this is the "auto-equalize" function, in Adobe Photoshop it is the "auto-level" function. The effect is to take the lightest pixel and make it pure white, the darkest pure black and balance everything in between. This has the immediate effect of reducing some of the magenta cast and increasing contrast.
|
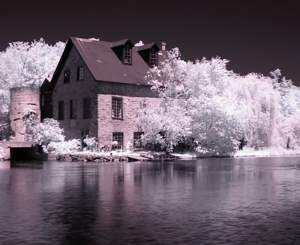 |
40% Saturation Reduction
The next stage is to reduce the saturation of the photo. A 100% saturation reduction would convert it to black and white. In this case, it is desirable to keep a "sepia tone" look to the photo, so saturation was reduced by 40% to produce this effect. This is one of the more critical steps with regard to the final look of the photo so play around with various levels of saturation reduction to see what you think looks best.
|
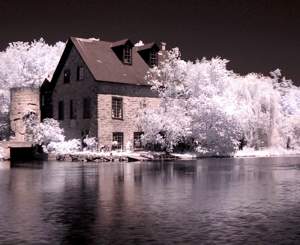 |
Hue and Contrast Enhanced
Sepia is a brown colour, so the hue of the photo was shifted 30% to yellow. To further enhance the definition between water, sky, trees and the building, contrast was increased by 10%.
|
 |
| Sharpening = Final Photo
The last stage (and this should ALWAYS be the last stage of any photo editing process) is to sharpen the image. For most, the "unsharp mask" or "adaptive unsharp" will produce the best results. |